Trading Places |
|
|---|---|
 |
|
| Mission Type | Main Mission |
| Location | Black Lake |
| REC. Level | Level 6 |
| Boss | Siege Mech |
| Reward/s | 20,000 XP |
| Prev. Mission | Mutual Dependencies |
| Next Mission | Empowerment |
Trading Places is a Main Mission in The Ascent. Main Missions mainly focus on progressing the main campaign and story of the game where you explore the world of Veles to find out what has happened through the arcology. Completing missions grants various rewards such as Weapons, Armor, and more, but most importantly, it yields EXP that is allocated into leveling up the player's character.
Boss Poone wants all able muslce to bring back the kidnapped indents from the Onyx Void. This is not just to help those who were kidnapped - those skilled and specialized indents are crucial for the survival of the IoHab.
Trading Places Objectives
- Speak with stackBoss Poone
- Locate the Coders' Cove
- Speak with Noghead
- Reach Arcology: Highstreet Tier
- Go to the Onyx Void HQ
- Speak with 438 Hung
- Kill the Onyx Void Operative
- Return to 438 Hung
- Go to Cosmodrome
- Reach the Malhorst Gelb Carrier
- Sabotage Malhorst Gelb Carrier
- Locate Missing Scientists aboard the Carrier
- Release Holding Cells Door Locks
- Access Ship Bridge
Trading Places Items
- Byxor
- HCF Heat
- Astrosmasher
- E-20 Killball Vest
- HMG-42 Dominator
- Faraday Skullbucket
- E-10 Energaze Visor
- PF-10 Supervisor Hat
- P-20 Mech Tech Pants
- Flatliner Combat Hood
- P-20 Slabworker Chest Plate
Trading Places Related NPCs
Trading Places Enemies
Trading Places Walkthrough
Find the Coders' Cove

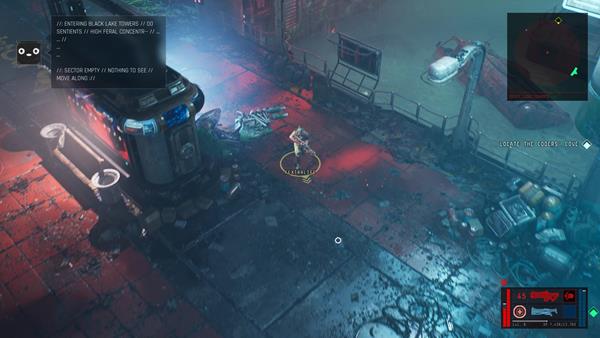
This mission becomes immeditaely available after completing Mutual Dependencies. Fast travel back to Cluster 13 via the Interlink train station and head to Serenity Plus. Speak to stackBoss Poone who's at his usual table to obtain your next job. Poone asks you to find the Coders' secret hideout which is at Black Lake - you will need to travel there by foot, so rely on using the waymerker ping to keep track of its location.

Before heading out, make sure you've allocated your accumulated Skill Points, purchase any Weapons, Augmentations, or Armor that you need, or, head to the Gun Smith to upgrade your weapon. When you're done, make your way to the Rooftops section and follow your waymarker to reach Black Lake. Just be mindful that you will be facing enemies along the way such as the gang members of the Turbo Viper - you will need to make your way to the Rooftops > Gratitude > Nitroad > Black Lake > Coders' Cove.

Upon reaching Nitroad, you will encounter a new enemy which is the Nug Gadgeteer. The Nug Gadgeteer is an alien enemy that uses its mechanical tools to attack you. It can build and set up a Missile Turret which will continuously shoot missiles at you until it is destroyed, it can also deply a healing station which heals both enemies and yourself if the character is standing within its radius, and the Nug Gadgeteer will also throw explosives at you which can be annoying. When you see the gadgeteer, take them out as fast as you can because they can be quite annoying to deal with, especially if there are multiple enemies around.

After clearing out the enemies upon arriving at Nitroad, walk abit to the southwest side of the area and look for the shop that has the sign "BioChoice Pharma". Go inside and you can find x1 Skill Point at the back of the store's counter, on top of the table. Once you've grabbed the skill point, continue towards Black Lake Towers where you'll encounter more enemies.

The path here is again, pretty linear, and all you can easily track the hideout by pinging the waymarker. You'll also find the Interlink station nearby which you can use to fast travel back to Arcology: The Warrens later on. As you get close to the hideout, you'll encounter Ferals here. Using a shotgun against them can easily take them out since they tend to run at you - keep moving until you reach the Coders' Cove.

Head inside the hideout, walk down the hallway and enter the room on the left that's at the end of the path. You'll respectively find the hackers' hideout. Your objective is to speak to Noghead and to gather intel regarding the kidnappings. Speak to him and look around the den before you head back outside.
A couple of things to point out here, through the door on the right side from where Noghead is, you can find x1 Faraday Skullbucket next to the Gun Smith, a Cyber Vendor if you need to buy new Tactical Items, the room storing the SI that's opposite to the Cyber Vendor holds a Basic Component and Advanced Component, and in the living room, which is the door behind Noghead, threre's a Cybderdeck upgrade that you can find that's next to the door, which is the City Kicker.

After speaking to Noghead, go back outside, you can either call a Taxi or take the Interlink train station to fast travel back to Arcology: The Warrens. When you reach the warrens, you'll encounter more Turbo Thugs here, and if you're lucky, Keen Buck, a Bounty can be found here as well. After killing the enemies, follow the waymarker until you reach the Interlink lift that will take you up to the Arcology: Highstreet.
Head to the Onyx Void HQ

Highstreet is a commercial and corporate based arcology, it is highly controled by the Rojin Association so you will bumb into Rojin gang members. They're quite deadly since they carry heavy guns and lethal katanas. Try not to get hit by the ones wielding a katana since they hit pretty hard and takes up a lot of your health. You'll need to pass by Highstreet > The Glut > The Node > so that you can find Onyx Void HQ. From the Glut, take the large lift to treach The Node.

Upon reaching the Onyx Void HQ, speak to 438 Hung to gain more intel reagrding the kidnappings. It won't be that easy since he will ask you to do a small job where you need to kill the Onyx Void Operative. Kill the target and in return, he will give you the information you need. Go back outside, and travel by foot to the East Gemini Tower that is heavily protected by Rojin. Make further preparations if needed since the battle can be a bit challenging.

To find the East Gemini Tower, pass by The Node, followed by Gemini Stacks. Ride the elevator to reach the the rooftop of the East Gemini Tower where you will find Rojin operatives andthe Onyx Void Operative. Using a Shotgun first will be better here so that you can easily take out the Rojin assassins, they're cloaked but you will be able to see them when they're close to you. Using the shotgun will stagger them, and about two to three shots will easily kill melee operatives.

As for the Onyx Void Operative, this mini-boss wields a mini-turret. The tip here is to take out all of the Rojin operatives first so that it's a one-on-one situation against the operative. Keep moving and take cover when he shoots! The only time he shoots is when you are within his sights, there is also a small window for you to counter-attack once his weapon overheats and tries to reload or recover from it. When this happens, shoot and then go back behind cover. Using your Shockwave Grenade can also briefly stun him, allowing you to attack before he recovers. Upon killing the mini-boss, you'll acquire the Onyx Void Dogtag that is to be given to 438 Hung as proof that you've killed the target - don't forget to open the chest as well that's on the rooftop before going back down.
Head to the Cosmodrome

Simply return to 438 Hung back at the Onyx Void HQ and he'll give you the information you need regarding the kidnappings. You'll learn that they are being held at a carrier that is set to departure. Leave the building and travel by foot to The Cosmodrome or call a taxi and fast travel to Highstreet then walk towards The Cosmodrome. Be prepared to fight since the area is full of Rojin operatives who will stop you from reaching the carrier.

When you're about 300m away from the objective, at Tham's Gate, check one of the reception area on the right side to find x1 Skill Point. Proceed further towards the carrier in The Cosmodrome and you'll be ambushed by a large mechanical robot.
Boss Battle: Siege Mech

When you are near the carrier, you'll be amsbushed by a large mechanical robot, the Siege Mech. You've probably acquired a strong AR from one of the enemies that drop it, which is the HMG-42 Dominator. Use this since it has a large clip and a decent amount of damage.

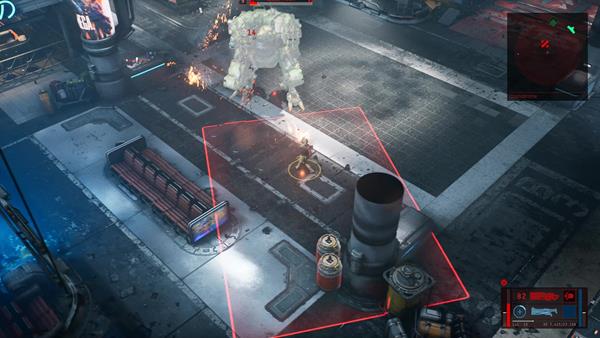
The Siege Mech has three attacks. First attack is it shoots out a barrage of missiles, second is where it shoots a Gatling Gun, and the other is an heavy barrage of attacks. All three of these attacks will have an indicator on the ground which will help you identify where the attacks will hit. As long as you are not within its radius, you won't take damage. The key here is to keep moving while you shoot, just like previous bosses you've encountered. The tricky part is the missiles, since you will need to roll away multiple times to avoid getting hit by the impact of the missile. Using your Hydraulic Slam augmentation can also help you stagger it for a brief moment.

As for the Gatling Gun attack, you'll see an arc indicator on the ground which tells you where the shots will land, while the heavy barrage attack appears as a large rectangle, infront of it. You need to watch out for the heavy barrage attack and quickly move away from its radius to avoid getting hit. Defeating this boss, drops the Astrosmasher weapon, an automatic rocket launcher.
Infiltrate the Carrier

After destroying the Siege Mech, head to the control panel of the Malhorst Gelb carrier so that you can sabotage the engine. It won't work first when you interact with it, but your IMP will call Noghead to ask for support. Noghead disables the engines for you and then you can head inside the carrier to free the hostages.

As soon as you enter the ship, you'll be amsbushed by MG Operatives. Quickly take cover and kill them as you head towards the east section of the carrier to find the panel that can unlock the holding cells. After releasing the hostages, you'll receive a call from Poone telling you that the MG Minion he is looking for has locked himself on the bridge's carrier.

Head to the bridge and kill all the remaining MG Operatives guarding the bridge. From there, approach the Life Support Control panel and actiavte it to unlock the bridge's compartment. A cutscene will then trigger and you'll find the M-G Rep that Poone is trying to find. From here, your character takes the rep back to Poone at Serenity Plus in Cluster 13 and you'll complete this mission - you'll then be rewarded with 20,000 XP for completing this mission, up next is Empowerment.
Trading Places Notes & Tips
- ??
- Notes, Tips, and other info goes here
