Walkthrough for The Ascent covers information that aims to guide players with providing a detailed guide on how to complete various locations and the main quests of the game. The walkthrough will include a list of all important items that can be found, gear such as Weapons, Augmentations, Armor and Modules, as well as information regarding related NPCs, Enemies, and Bosses.
The Ascent Wiki: Beginner Guide
The Ascent Wiki: Helpful Links
- See Game Progress Route for an overview walkthrough guide.
- See Side Missions for a list of optional tasks or check the Missions page for a list of all quests.
- Visit our New Player Help page for Tips and Tricks for ARPG beginners.
- Check out our Combat page to find various guides on Combat, Exploration, and more.
- The New Game Plus page covers information on the features and assets that are carried over upon finishing the main campaign.
The Ascent Full Walkthrough
Main Missions Walkthrough Navigate:
Arcology Blues
Arcology Blues |
|
|---|---|
 |
|
| Mission Type | Main Mission |
| Location | Sub-Sector 41A |
| REC. Level | Level 1 |
| Boss | Papa Feral |
| Reward/s | 3,000 XP |
| Prev. Mission | n/a |
| Next Mission | Mutual Dependencies |
Arcology Blues is a Main Mission in The Ascent. Main Missions mainly focus on progressing the main campaign and story of the game where you explore the world of Veles to find out what has happened through the arcology. Completing missions grants various rewards such as Weapons, Armor, and more, but most importantly, it yields EXP that is allocated into leveling up the player's character.
While sent on a routine assignment to update the local waste management SI, the Player is caught in a vortex of catastrophic events.
Arcology Blues Objectives
- Reach the Waste Management System SI Control Room
- Investigate the Cause of SI Shutdown
- Purge Memory Banks
- Replace Interface Circuitry
- Reboot the SI
- Return to Cluster 13
- Access Datanet
Arcology Blues Items
- Habdefender PPW
- PF-10 Supervisor Hat
- Shockwave Grenade
- Hydraulic Slam
- Shirt Skin: Kawaii
- Weapon Skin: Sleek Black
- Weapon Skin: Dirty Chrome
Arcology Blues Related NPCs
Arcology Blues Enemies
Arcology Blues Walkthrough
The Waste Management

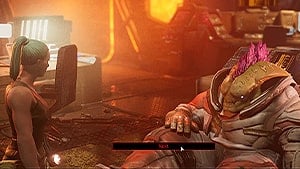
You journey beings as you arrive in Sub-Sector 41A, a waste management disposal area whete an ERRATIC behavior has been reported. You play as a worker of The Ascent group and you first task is to update the local waste management SI. The purpose of this mission is to show you what the game is all about, it introduces you to the basic and some advanced combat mechanics of the game, and provides you with various tutorials.

Proceed down the path and you'll formally begin this main mission and you'll hear stackBoss Poone in comms. Continue straight and then make a left where you'll see a robot rummaging through some trash on the right side of the path you just turned. On the opposite side of the robots, there's a small room, go inside and you'll find a Data Pad on the table, and you can aslo open the lockers to find a Weapon Skin: Sleek Black. After grabbing the items, head up the stairs and continue towards the objective - if you're lost, press O on your keyboard to ping the objective tracker.
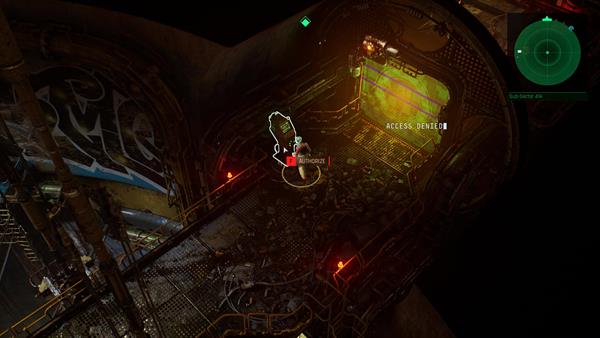
Continue forward and you'll come across an interactable terminal. Simply press F to interact with objects, take note that there are many types of interactables not limited to people, terminals, doors, and pick-ups. Simply press F by the terminal to unlock the door. Move forward and just around the corner as you turn, you'll see a body, get close to it and press the interact button to loot it to find some UCRED - UCRED is the currency used in The Ascent to purchase items, goods, and services,

After looting the body, keep going straight and you'll find another locked door that requires you to authorize access by using the terminal next to it. But before doing so, make sure to check the crates at the end of the path to find some items such as Shirt Skin: Kawaii and some UCRED. See related image above. After checking the crates, unlock the door and proceed into the control room where you'll meet Trummer- approach him and speak to him to learn more about the mission, ask him questions, and then choose [Accept].

Before you head further into the waste disposal and investiaget the cause of the SI shutting down, make sure to rummage through the control room. You can find a datapad on a desk that's on the left side of Trummer, and next to it is a snack vending machine which you can use to buy health or energy replenishing items. When you're ready, proceed towards the door on the left side until you reach another door that has a yellow colored holographic door. Position yourself in between the terminal and the door and use the hacking button with your cyberdeck to unlock it - also, don't forget to break the crates nearby to find som UCRED.
Reach the Large Terminal

Proceed further and you'll encounter the first group of enemies. You'll see a group of Ferals here. They tend to run towards you, so be sure to shoot first to gain the upper hand before they jump at you. The path here is pretty much linear but along the way, you will encounter a lot of these alien enemies. Head up the stairs and reach the objective. Simply press O on the keyboard to ping the tracker which will lead you to a large terminal.

Approach the terminal and access it to obtain your next objecive which is to purrhge the memory banks so that you can reboot the system. Head to the first memory bank which is guarded by a group of Ferals, again, you just need to press O to track the objective. Along the way, make sure to open a chest before reaching the first memory bank. You'll find a chest on the right hand side of the map, at a dead end, which is opposite to where the first memory bank is, the chest you'll find contains UCRED - once you clear the area of Ferals, interact with the Memory Bank to purge it and proceed to the next.

For the second Memory Bank, it is guarded by a group of Turbo Thugs, hostile human enemies that like to stir trouble. When you approach them, they'll first give you a warning to back off, but you can just go ahead and shoot them and then access the Memory Bank. Here, you can find some items such as an SMG, the Habdefender PPW which is on the ground, and another chest containing a PF-10 Supervisor Hat.

After clearing out the memory banks, simply follow the waymarker and head back towards the control room where Trummer is and head towards the door on his right to reach the main panel that will reboot the SI. Be mindful that along the way, as you head back to the control room via a shortcut, there will be Ferals roaming the area - when you reach the SI control panel, access it to reset it and you'll obtain the next objective.
Return to Cluster 13

Now, retrace your steps back and return to Cluster 13. As you approach one of the doors, an emergency protocl will trigger and the doors will be locked. So you will need to take an alternate route to escape the waste disposal. Ping the waymarker to reach the emergency tunnel bypass. Be cautious here since, there will be a lot of Ferals in the area. Hack the locked door that the waymarker leads you to and you'll find yourself on a footbridge. Thre's a body here where you can find a Datapad, some UCRED from the body, and a Shockwave Grenade- the path here is pretty much linear and all you need to do is reach the Waste Recycling Network.
Boss: Papa Feral

You'll now have to fight against the first boss of the game, Papa Feral. Papa Feral will have back up for the entirety of the battle, so there will be hordes of Ferals that will fight alongside the big bad. Since you have an SMG, it's good that you can just keep shooting non-stop untl you reload. Take out the Ferals first as fast as you can and keep moving! That's the key to winning this match. Once Papa Feral is on its own, you can focus on attacking it before reinfcorements jump back in. Using the Shockwave Grenade is also a good counter against them since it breifly immobilzes their movement if they are caught by the blast radius.
Papa Feral has two attacks, one is where Papa Feral leaps into the air and tries to stomp on your last location. You can easily dodge this once you see a red circle outline that appears under you on the ground. While the other is where he shooots out a barrage of missiles which again you can figure out where the missiles will land with the circle outlines that appear on the ground. Again, the tactic here is to keep moving and shooting when there's an open window. Avoid getting outnumbered by the Ferals and do not get stuck to a corner. Defeating Papa Feral drops a large amoung of UCREDs.
Cluster 13

After the battle, proceed to the emergency tunnel, along the way, you'll finda red chest containing an Augmentation item, the Hydraulic Slam. The chest is just behind a terminal door across the arena where you fought Papa Feral. From here, simply head to the Arcology: Deepstink and kill the rest of the Ferals along the way. Head east from the deepstink and use the interlink to reach the Arcology: The Warrens.

Upon reaching the Arcology: The Warrens, simply follow the waymarker by pinging it so that you can reach Cluster 13. Approach the datanet to hadn in your report and to complete this mission. You'll then be rewarded with 3,000 XP. From here, you can roam around the area or just track the next main misssion, Mutual Dependencies.
Mutual Dependencies
Mutual Dependencies |
|
|---|---|
 |
|
| Mission Type | Main Mission |
| Location | Grinder |
| REC. Level | Level 3 |
| Boss | n/a |
| Reward/s | 10,000 XP |
| Prev. Mission | Arcology Blues |
| Next Mission | Trading Places |
Mutual Dependencies is a Main Mission in The Ascent. Main Missions mainly focus on progressing the main campaign and story of the game where you explore the world of Veles to find out what has happened through the arcology. Completing missions grants various rewards such as Weapons, Armor, and more, but most importantly, it yields EXP that is allocated into leveling up the player's character.
With corpSec mostly gone due to the bankrupcy, it falls on each stack to fend for itself. In their current state, they're extremely vulnerable to approriation by a rival Corp craving more indent workers, or even Onyx Void looking to boost their black-market organ and aug trade.
The Ascenders has sent some emergency supplies (and a couple of lesser influencers hoping to recruit more Subs), but it's not nearly enough, and most IoHab indents don't trust the Cult's intentions anyway.
stackBoss Poone, has contacted the informal leaders of the neighboring stacks and suggested a IoHab alliance. A meeting is to be held in the neutral Pleasure district, where they are to hammer out the details.
Mutual Dependencies Objectives
- Speak with Stackboss Poone
- Go to the Grinder District
- Kill the Fullchromes (4/4)
- Go to the Meeting Location
- Defeat the Attackers
Mutual Dependencies Items
- Shirt Skin: Canary
- Dread
- Riot Gun
- P1 Protector
- Maser Squint Visor
- Deepstink Rebreather
- PF-10 Supervisor Hat
Mutual Dependencies Related NPCs
Mutual Dependencies Enemies
Mutual Dependencies Walkthrough
Speak to Poone

This mission immediately becomes available after completing Arcology Blues. You'll find yourself in Cluster 13 as you finish rebooting the SI in the waste disposal area. Simply head up to Serenity Plus and speak to stackBoss Poone to gather intel about the new job. After speaking to him, there's a mean next to Poone's table where you'll see a diamond icon on top of his head. Speak to him and accept the side mission, Gear Up!
Side Mission: Gear Up!

The man you speak to identifies you as Poone's new pet, he then hands you over 12,000 UCRED so that you can use it to visit the Grafter, the Armor Dealer, and Weapons Dealer so that you can buy new upgraded gear. The objective is very simple, just simply visit all three merchants and it is optional if you want to buy new Weapons, Armor, or have new Augmentations implanted. Do this side mission first and complete it before heading over to the Grinder District - it is recommended that you at least buy upgraded armor pieces to increase your defenses since you'll be fighting a lot of enemies during this main mission.
Head to the Grinder District

Once you're done visiting the merchants around Cluster 13, proceed to the main mission's objective which is to infiltrate the Grinder District. Follow the waymarker and you'll reach the Rooftops of Cluster 13. Step onto the lift and ride it down. Approach the helipad on the left and you'll see a chest containing some UCRED and a Maser Squint Visor.

From the helipad, if you go right, and down the stairs, you'll find an abandoned shop that you can go inside. By the door, there's another chest containing UCREDs and inside, there's a datapad for you to read, as well x1 Basic Component. Outside by the other door, there's also some crates that you can destroy to find some UCREDs and a Shirt Skin: Canary. From here it doens't really matter which path you take since it will both lead you towards the first section of the Turbo Viper's hideout - your primary goal is to kill any enemies you encounter, reach the art gallery of the Grinder District, and secure the area for Poone.

Reaching further into their hideout in the Gratitude becomes tough since you will encounter more gang members. A good tactic to avoid death is to use covers and shoot while you are behind obstacles. This way, you can deal damage while protecting yourself from enemies that are using firearms. Keep an eye out as well to your surroundings since you can shoot explosive barrels and vehicles and make these objects explode, instantly killing or inflicting a large amount of damage to enemies caught within the blast radius - just take note that you can also get damaged if you get hit by the blast.
Reach the Grinder

You'll arrive at the innermost section of the gang's area, No Man's Land. There will be more Turbo Thugs here, so be ready to take cover and shoot down the enemies. One of the thugs here will drop a new weapon that you can use, the Dread. Proceed to the marked objective as you fight your way through the gang memebrs in No Man's Land until you reach the Grinder. When you reach a certain point of the Grinder, Poone will warn you about the Turbo Vipers going all in to kill you, and that they've deployed their leash-holding fullChromes - your next objective now is to take out x4 of these enhanced humanoids.

There are four Fullchromes that you need to kill and they're all around the Grinder area. All four of these are accompanied by a group of Turbo Thugs, so what you want to do is to take out the thugs first as fast as you can so that you can priamrily focus on taking out the Fullchrome humanoid. You'll know when there's a Fullchrome nearby when there's a red skull indicator on top of the enemy's head.

The Fullchrome wields a rocket launcher that tracks your movement until it comes into contact. So that's why you need to kill all the thugs first so that you can watch out for those annoying rockets. At some point, the Fullchrome will also fall to the ground for a brief moment where it looks like it is overheated and it tries to reboot. When this happens, take the advantage to shoot it down and kill it. Take out all four Fullchromes, head to the art gallery and secure the area.
Stand your Ground!

Upon entering the art gallery, a short cutscene will trigger where you'll see more Turbo Thugs reinforcements arrive. Poone then asks you to defend the area as they try to make it, but really, you'll just be fighting the enemies here on your own. Kill multiple thugs here and eventually, another short cutscene will trigger where two brute enemies will appear, the Hammerhand.

Take out all of the thugs first as fast as you can before fighting the two Hammerhand. The Hammerhand are just elite enemies but they have two unique attacks where they slam their large hammer on the ground which causes a line of shockwave towards your direction and they charge forward at you like a bull. The key here is to maintain a mid-distance and shoot them down. if you have the Dread AR, use it since it has more damage, and you can also throw a Shockwave Grenade to temporarily stun them.
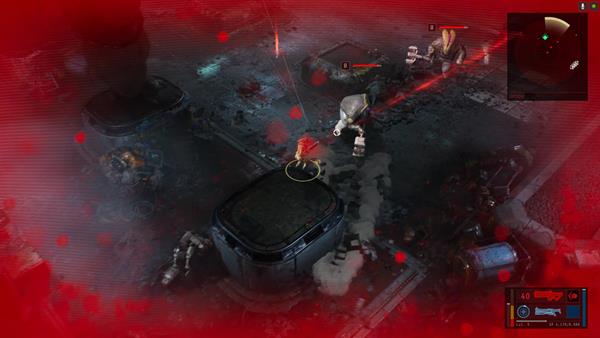
Hiding behind cover will not work against them since the shockwave attack goes through walls, SO KEEP MOVING WHILE YOU SHOOT. Defeating all enemies will trigger a cutscene and complete the mission , and you'll be rewarded with 10,000 XP - from here, you can take the interlink back to Cluster 13 and speak to stackBoss Poone.
Trading Places
Trading Places |
|
|---|---|
 |
|
| Mission Type | Main Mission |
| Location | Black Lake |
| REC. Level | Level 6 |
| Boss | Siege Mech |
| Reward/s | 20,000 XP |
| Prev. Mission | Mutual Dependencies |
| Next Mission | Empowerment |
Trading Places is a Main Mission in The Ascent. Main Missions mainly focus on progressing the main campaign and story of the game where you explore the world of Veles to find out what has happened through the arcology. Completing missions grants various rewards such as Weapons, Armor, and more, but most importantly, it yields EXP that is allocated into leveling up the player's character.
Boss Poone wants all able muslce to bring back the kidnapped indents from the Onyx Void. This is not just to help those who were kidnapped - those skilled and specialized indents are crucial for the survival of the IoHab.
Trading Places Objectives
- Speak with stackBoss Poone
- Locate the Coders' Cove
- Speak with Noghead
- Reach Arcology: Highstreet Tier
- Go to the Onyx Void HQ
- Speak with 438 Hung
- Kill the Onyx Void Operative
- Return to 438 Hung
- Go to Cosmodrome
- Reach the Malhorst Gelb Carrier
- Sabotage Malhorst Gelb Carrier
- Locate Missing Scientists aboard the Carrier
- Release Holding Cells Door Locks
- Access Ship Bridge
Trading Places Items
- Byxor
- HCF Heat
- Astrosmasher
- E-20 Killball Vest
- HMG-42 Dominator
- Faraday Skullbucket
- E-10 Energaze Visor
- PF-10 Supervisor Hat
- P-20 Mech Tech Pants
- Flatliner Combat Hood
- P-20 Slabworker Chest Plate
Trading Places Related NPCs
Trading Places Enemies
Trading Places Walkthrough
Find the Coders' Cove

This mission becomes immeditaely available after completing Mutual Dependencies. Fast travel back to Cluster 13 via the Interlink train station and head to Serenity Plus. Speak to stackBoss Poone who's at his usual table to obtain your next job. Poone asks you to find the Coders' secret hideout which is at Black Lake - you will need to travel there by foot, so rely on using the waymerker ping to keep track of its location.

Before heading out, make sure you've allocated your accumulated Skill Points, purchase any Weapons, Augmentations, or Armor that you need, or, head to the Gun Smith to upgrade your weapon. When you're done, make your way to the Rooftops section and follow your waymarker to reach Black Lake. Just be mindful that you will be facing enemies along the way such as the gang members of the Turbo Viper - you will need to make your way to the Rooftops > Gratitude > Nitroad > Black Lake > Coders' Cove.

Upon reaching Nitroad, you will encounter a new enemy which is the Nug Gadgeteer. The Nug Gadgeteer is an alien enemy that uses its mechanical tools to attack you. It can build and set up a Missile Turret which will continuously shoot missiles at you until it is destroyed, it can also deply a healing station which heals both enemies and yourself if the character is standing within its radius, and the Nug Gadgeteer will also throw explosives at you which can be annoying. When you see the gadgeteer, take them out as fast as you can because they can be quite annoying to deal with, especially if there are multiple enemies around.

After clearing out the enemies upon arriving at Nitroad, walk abit to the southwest side of the area and look for the shop that has the sign "BioChoice Pharma". Go inside and you can find x1 Skill Point at the back of the store's counter, on top of the table. Once you've grabbed the skill point, continue towards Black Lake Towers where you'll encounter more enemies.
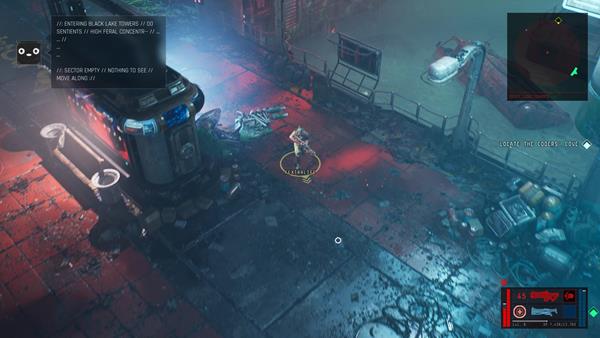
The path here is again, pretty linear, and all you can easily track the hideout by pinging the waymarker. You'll also find the Interlink station nearby which you can use to fast travel back to Arcology: The Warrens later on. As you get close to the hideout, you'll encounter Ferals here. Using a shotgun against them can easily take them out since they tend to run at you - keep moving until you reach the Coders' Cove.

Head inside the hideout, walk down the hallway and enter the room on the left that's at the end of the path. You'll respectively find the hackers' hideout. Your objective is to speak to Noghead and to gather intel regarding the kidnappings. Speak to him and look around the den before you head back outside.
A couple of things to point out here, through the door on the right side from where Noghead is, you can find x1 Faraday Skullbucket next to the Gun Smith, a Cyber Vendor if you need to buy new Tactical Items, the room storing the SI that's opposite to the Cyber Vendor holds a Basic Component and Advanced Component, and in the living room, which is the door behind Noghead, threre's a Cybderdeck upgrade that you can find that's next to the door, which is the City Kicker.

After speaking to Noghead, go back outside, you can either call a Taxi or take the Interlink train station to fast travel back to Arcology: The Warrens. When you reach the warrens, you'll encounter more Turbo Thugs here, and if you're lucky, Keen Buck, a Bounty can be found here as well. After killing the enemies, follow the waymarker until you reach the Interlink lift that will take you up to the Arcology: Highstreet.
Head to the Onyx Void HQ

Highstreet is a commercial and corporate based arcology, it is highly controled by the Rojin Association so you will bumb into Rojin gang members. They're quite deadly since they carry heavy guns and lethal katanas. Try not to get hit by the ones wielding a katana since they hit pretty hard and takes up a lot of your health. You'll need to pass by Highstreet > The Glut > The Node > so that you can find Onyx Void HQ. From the Glut, take the large lift to treach The Node.

Upon reaching the Onyx Void HQ, speak to 438 Hung to gain more intel reagrding the kidnappings. It won't be that easy since he will ask you to do a small job where you need to kill the Onyx Void Operative. Kill the target and in return, he will give you the information you need. Go back outside, and travel by foot to the East Gemini Tower that is heavily protected by Rojin. Make further preparations if needed since the battle can be a bit challenging.

To find the East Gemini Tower, pass by The Node, followed by Gemini Stacks. Ride the elevator to reach the the rooftop of the East Gemini Tower where you will find Rojin operatives andthe Onyx Void Operative. Using a Shotgun first will be better here so that you can easily take out the Rojin assassins, they're cloaked but you will be able to see them when they're close to you. Using the shotgun will stagger them, and about two to three shots will easily kill melee operatives.

As for the Onyx Void Operative, this mini-boss wields a mini-turret. The tip here is to take out all of the Rojin operatives first so that it's a one-on-one situation against the operative. Keep moving and take cover when he shoots! The only time he shoots is when you are within his sights, there is also a small window for you to counter-attack once his weapon overheats and tries to reload or recover from it. When this happens, shoot and then go back behind cover. Using your Shockwave Grenade can also briefly stun him, allowing you to attack before he recovers. Upon killing the mini-boss, you'll acquire the Onyx Void Dogtag that is to be given to 438 Hung as proof that you've killed the target - don't forget to open the chest as well that's on the rooftop before going back down.
Head to the Cosmodrome

Simply return to 438 Hung back at the Onyx Void HQ and he'll give you the information you need regarding the kidnappings. You'll learn that they are being held at a carrier that is set to departure. Leave the building and travel by foot to The Cosmodrome or call a taxi and fast travel to Highstreet then walk towards The Cosmodrome. Be prepared to fight since the area is full of Rojin operatives who will stop you from reaching the carrier.

When you're about 300m away from the objective, at Tham's Gate, check one of the reception area on the right side to find x1 Skill Point. Proceed further towards the carrier in the Cosmodrome and you'll be ambushed by a large mechanical robot.
Boss Battle: Siege Mech

When you are near the carrier, you'll be amsbushed by a large mechanical robot, the Siege Mech. You've probably acquired a strong AR from one of the enemies that drop it, which is the HMG-42 Dominator. Use this since it has a large clip and a decent amount of damage.

The Siege Mech has three attacks. First attack is it shoots out a barrage of missiles, second is where it shoots a Gatling Gun, and the other is an heavy barrage of attacks. All three of these attacks will have an indicator on the ground which will help you identify where the attacks will hit. As long as you are not within its radius, you won't take damage. The key here is to keep moving while you shoot, just like previous bosses you've encountered. The tricky part is the missiles, since you will need to roll away multiple times to avoid getting hit by the impact of the missile. Using your Hydraulic Slam augmentation can also help you stagger it for a brief moment.
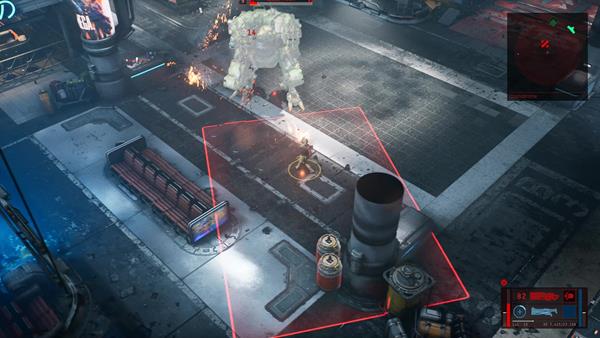
As for the Gatling Gun attack, you'll see an arc indicator on the ground which tells you where the shots will land, while the heavy barrage attack appears as a large rectangle, infront of it. You need to watch out for the heavy barrage attack and quickly move away from its radius to avoid getting hit. Defeating this boss, drops the Astrosmasher weapon, an automatic rocket launcher.
Infiltrate the Carrier

After destroying the Siege Mech, head to the control panel of the Malhorst Gelb carrier so that you can sabotage the engine. It won't work first when you interact with it, but your IMP will call Noghead to ask for support. Noghead disables the engines for you and then you can head inside the carrier to free the hostages.

As soon as you enter the ship, you'll be amsbushed by MG Operatives. Quickly take cover and kill them as you head towards the east section of the carrier to find the panel that can unlock the holding cells. After releasing the hostages, you'll receive a call from Poone telling you that the MG Minion he is looking for has locked himself on the bridge's carrier.

Head to the bridge and kill all the remaining MG Operatives guarding the bridge. From there, approach the Life Support Control panel and actiavte it to unlock the bridge's compartment. A cutscene will then trigger and you'll find the M-G Rep that Poone is trying to find. From here, your character takes the rep back to Poone at Serenity Plus in Cluster 13 and you'll complete this mission - you'll then be rewarded with 20,000 XP for completing this mission, up next is Empowerment.
Empowerment
Empowerment |
|
|---|---|
 |
|
| Mission Type | Main Mission |
| Location | RBM-5 |
| REC. Level | Level 11 |
| Boss | Megarachnoid |
| Reward/s | 30,000 XP |
| Prev. Mission | Trading Places |
| Next Mission | Data Miner |
Empowerment is a Main Mission in The Ascent. Main Missions mainly focus on progressing the main campaign and story of the game where you explore the world of Veles to find out what has happened through the arcology. Completing missions grants various rewards such as Weapons, Armor, and more, but most importantly, it yields EXP that is allocated into leveling up the player's character.
To ensure protection agasinst Onyx Void and rival corporations, the IoHab needs to boost its security systems. But to power these, it needs a secure source of energy, and this would also benefit the fragile IoHab alliance as a whole. Boss Poone wants to secure the nearest fission powerplant by hacking a sort of energy distribution backdoor to be used by the IoHab Alliance.
Empowerment Objectives
- Speak with stackBoss Poone
- Go to the Reactor Facilities
- Boost Cooling System
- Raise Energy Output
- Override Distribution Hub
- Conceal the Train from the Tokamak SI
Empowerment Items
- Shirt Skin: Neon Giant
- Shirt Skin: Pink
- Shirt Skin: Canary
- Ice-Breaker Googles
- F-30 Hellfire Work Jacket
Empowerment Related NPCs
Empowerment Enemies
Empowerment Walkthrough
Reach the Reactor Facilities

This mission becomes immeditaely available after completing Trading Places. You'll be back in Cluster 13 at the end of the previous mission, so head back to Serenity Plus and speak to stackBoss Poone to obtain your next job. Poone basically asks you to secure power to strengthen the defenses against the Onyx Void and other corpos. After speaking to Poone, we'd recommend you to increase your level first, upgrade your Skills, Weapons, and Armor to prepare for this mission.

If you're done, travel to The Warrens and head east and ride the Arcology below to reach the Reactor Facilities, you'll need to pass through the Deepstink > Waste Recycling Network, then reach RBM-5. Work your way through the deepstink and the waste recycling network as you fight hordes of Ferals. The path here is pretty linear until you reach the reactor facility, RBM-5.

When you're about 300m away from the reactor facility, you'll come across a small commoners area, here you'll find a snack vending machine, a Basic Component, two lockers containing some UCREDs, and loot crates that you can destroy to find more items. From here, just go staight, hack the door, and fight your way through more Ferals until you reach RBM-5.

Before you proceed to the facility's entrance, after passing through the commoner's area, and then hacking the door, you'll see a terminal that controls a bridge on the left side. Activate it and walk all the way to the end at the west side, you'll find a red chest containing x1 Skill Point - after grabbing it, go back and head towards the reactor facility.
Override the Hub

Upon reaching RBM-5, you'll have three objectives here, reach three different panels to boost the cooling system, to raise the energy output, and to override the distribution hub. Simply press O on the keyboard so that you can track the location of the panels. All you need to do is proceed there first since most of the areas around the facility are locked and you need to override the hub first in order to unlock certain doors, there are however, lockers and crates in some rooms which you can open to find UCREDs or skins.

When you obtain the task to raise the energy output, you'll reach the RBm-5 Core. When you arrive at the core's terminal, you'll find a red chest on the left containing a F-30 Hellfire Work Jacket. After grabbing the item, interact with the control rod assembly to raise the energy. When that's done, just proceed to the next terminal to override the distribution hub. From here, you just need to find the room containing the SI so that you can conceal the opreation you've just done.
Boss Battle: Megarachnoid
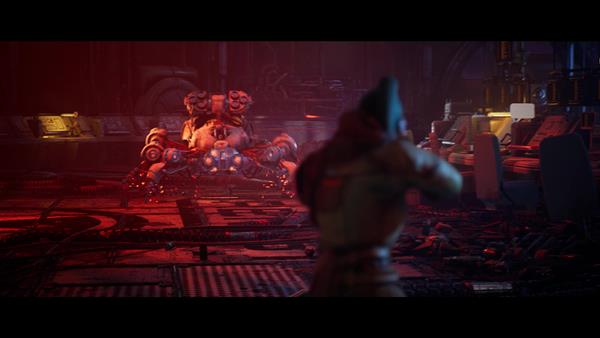
Upon reaching the room that's holding the SI, you'll encounter a boss which is the Megarachnoid. A large spider-mech that can be quite challenging to face. For this boss, the Megarachnoid has two attacks, one is where it sprays flames at you like a flamethrower, and the other is where it spawns small mechanical spiders at you either from itself or from the mechanical eggs it shoots on the ground.
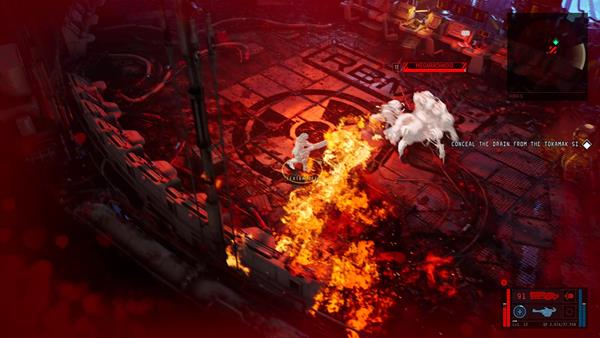
For this boss battle, you may need to have your Evasion skill at a high level or equip an armor piece that has high defense. Another way to help you is to use an Assault Rifle that is upgraded and has high damage to easily destroy this boss. Maintain a mid-distance as well so that you don't catch yourself in flames from its Flamethrower attack. The biggest tip to defeat this boss is to purchase the ER Chrome Puncher. It is a precision rifle that shoots out energy bullets. This can deal significant damage since you are fighting a mechanical enemy.

What you want to watch out for are when it shoots out mechanical eggs that spawn those small spiders or when the Megarachnoid does it. When you see these small spiders, immediately shoot it down before it gets close to you and destroy those mechanical eggs. You can also hack it so that you can shoot it and make it explode like a bomb when it is lit with a green indicator. If ever a spider does get near you, wait for about 1 second before you dodge roll because it will prepare before it jumps on you.
It can be quite annoying if you get hit multiple times since it has a blast radius that stuns and damages you. Keep moving while you shoot and keep an eye out for those baby spider-bots. After defeating the boss, you'll complete this quest, be rewarded with 30,000 XP, head out the exit on the north side of this boss arena and activate the bridge to find two chests, from there, return to Cluster 13, report to your new boss and start the next mission.
Data Miner
Data Miner |
|
|---|---|
 |
|
| Mission Type | Main Mission |
| Location | dNexus |
| REC. Level | Level 13 |
| Boss | n/a |
| Reward/s | 50,000 XP |
| Prev. Mission | Empowerment |
| Next Mission | Foreign Code |
Data Miner is a Main Mission in The Ascent. Main Missions mainly focus on progressing the main campaign and story of the game where you explore the world of Veles to find out what has happened through the arcology. Completing missions grants various rewards such as Weapons, Armor, and more, but most importantly, it yields EXP that is allocated into leveling up the player's character.
yCorp knows the Ascent Group was working on a secret project which might have been the cause of the sudden bankruptcy. The Ascent Group board would know what it is, but reaching them is well-nigh impossible, and instead yCorp has tasked me with first going after softer targets on these lower levels.
WIth the IMP now connected to the yCorp AGI, I am able to permanently appropriate property for yCorp by rewriting the SI firmware of any given piece of property.
Data Miner Objectives
- Speak with Kira
- Recruit the Help of Noghead
- Go to the Data Storage District
- Rach Data Vault Access Chamber
- Stop the Ascenders from activating the HPM-Emitter
- Enter the AG OPS Data Vault
- Appropriate the AG OPS Data Vault
- Access AG OPS Data
Data Miner Items
- Byxor
- Looten
- HCF Heat
- E77 Superior
- EBR Enforcer
- Handyman Backpack
- E-10 Secforce Trousers
- PF-30 Jackhammer Rat
- ED-30 Urban Scout Armor
- P-10 Slabworker Chest Plate, Light
- P-30 Enforcer-3 Anti-Riot Leggings
Data Miner Related NPCs
Data Miner Enemies
Data Miner Walkthrough
A New Boss

This mission becomes immeditaely available after completing Empowerment. Return to Cluster 13 and use your waymarker ping to find yCorp's hideout-base which is near Serenity Plus. You'll learn that yCorp has shown interest in your capabilites and without any other way out, has enlsited you to work for them as their operative. Simply speak to Kira to gather intel for your first mission with yCorp. Also, by the balcony of the yCorp hideout, you can find x1 Advanced Component.

After speaking to Kira, fast travel by Taxi or Train, or if you feel like travelling by foot to Black Lake Tower, proceed to the Coder's Cove, and speak to Noghead. Be cautious since you'll fight agaisnt Ferals and a couple of Papa Feral enemies as you travel to the Coder's Cove from Black Lake Tower. Once you've spoken to Noghead, you've basically asked him for his help as you hijack the AGI that is being asked by Kira - from here, fast travel again by Taxi or Train, or by foot, to The Warrens, head east from The Warrens, and take the lift down leading to Deepstink.
Head to dNexus

Upon arriving at the Deepstink, follow the waymarker until you reach the center section of the area, and ride the large lfit to dNexus. If you've followerd the walkthrough from the Empowerment mission, you should have at least an energy weapon in your inventory such as the ER Chrome Puncher. The reason why you need an energy weapon here is because you will be fighting against mechanical enemies here. There will be spiderbots, turrets, Logbots, and Ascender Combatants. If you come acress Ascender Comabtants, you can use ballistic weapons against them or energy weapons as well.

The design of this area seems like you're in a maze since you will need to activate or retract brdige panels so that you can reach the next platform, but luckily, you have the waypoint marker that you can ping so that you can simply follow the path leading to the Access Chamber.

When you\re mear the lift leading to the Access Chamber, you'll come across a large group of Ascender Combatants guarding the area and trying to activate the HPM-Emitter. You'll need to stop them and eliminate the group before you can proceed. These enemies are easy, just use your strong Assault Rifle and shoot them down. If you also have the Spiderbots augmentation, it can help you to easily take out all of the enemies at once - from here, proceed to the mission objective and upon arriving, ride the lift down to the data vault.
The AG Data Vault

Go straight and when you reach the next room past the short narrow path, you'll see a locked ches on the right that requires ICE - 2. You won't open it for now unless you upgrade your Cyberdeck hacking tool, next to the chest, on the other hand, is a cyberdeck upgrade, the Peacemaker CD. Always make sure to open the Cyberdeck tab in the main menu so you can see the capabilities or upgrades you've acquired for the hacking tool that you have.

After grabbing the item, proceed to the main panel of the data vault and begin to appropriate it. Upon doing so, you will need to survive and fight against CGT enemy forces until the process is complete which is for 2 minutes and 45 seconds. For this battle, use your energy weapon, if you even have the E77 Superior or the EBR Enforcer which you obtain here as an item drop from an enemy, USE IT! The enemies you fight here are weak to energy-based attacks.
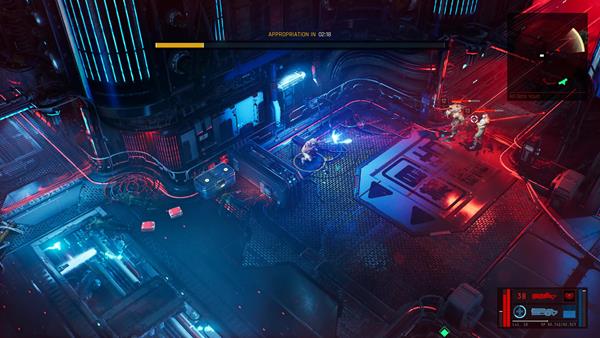
Having the Spiderbots, Hyper Focus, or Homing MIM augments equipped will help you here as well, and you want to be as offensive as you can since enemies will keep coming until the timer reaches zero. For your Tactical Items, bringing the GX-43 "Sweet Justice" is a good choice if you want to take out groups of enemies at once, but you can also use a Rejuv Field for sustainability. Kill all of the enemies upon the imprint process is complete, and then go back to the central terminal of the data vault to access the data.

When that's done, retrace your steps and ride the lift back uo to the dNexus and head towards antoher terminal to transfer the data from teh NOC. Wait for a few mintues for the process to be complete and you'll complete this quest, rewarding you with 50,000 XP. Kira also advises you that you are now an official operative of the yCorp under the Property Appropriation Divison. From here, travel back by foot to the Deepstink, and go back to The Warrens, you'll then receive a message from Noghead saying that Kira is hiding something from you - your next mission, is Foreign Code where you'll need to head to Onyx Void.
Foreign Code
Foreign Code |
|
|---|---|
 |
|
| Mission Type | Main Mission |
| Location | The Node |
| REC. Level | Level 17 |
| Boss | X-28 Havoc |
| Reward/s | 65,000 XP |
| Prev. Mission | Data Miner |
| Next Mission | Trace Protocol |
Foreign Code is a Main Mission in The Ascent. Main Missions mainly focus on progressing the main campaign and story of the game where you explore the world of Veles to find out what has happened through the arcology. Completing missions grants various rewards such as Weapons, Armor, and more, but most importantly, it yields EXP that is allocated into leveling up the player's character.
I am sent to Onyx Void to learn exactly who and what they smuggled onto the planet.
Foreign Code Objectives
- Go to the Onyx Void Chapter House
- Access the Blimp Traffic Control Node
- Use the Back Entrance into the Onyx Void Chapter House
- Access the Onyx Void Subnet Terminal
- Go to the Dream World
- Follow the Shipping Master
- Go to the Cosmodrome
- Locate the Shipping Master
- Reach Docking Bay 94
- Board the Wrecked Ship
Foreign Code Items
- x1 Skill Point
- x2 Advanced Component
- Life Transfer
- Propulsion Leap
- P9000 Roomsweeper
- PF-40 Velocity Helmet
- ED-30 Fintech Trousers
- GR8 GFragmost Grenade
- Shut the Docking Bay Gate
Foreign Code Related NPCs
Foreign Code Enemies
Foreign Code Walkthrough
Infiltrate the Onyx Void HQ

This mission becomes immeditaely available after completing Data Miner and once you leave dNexus. You'll receive a message from Noghead first telling you that yCrop may have some shady intentions and are not who they think they say. You'll then receive a message from Kira asking you to find out what the Onyx Void has smuggled onto the planet - head to Highstreet and then travel by taxi or train to The Node.

Upon arriving, follow the waymarker and your IMP will asdvise you to create a diversion so that you can sneak in at the restricted area of the Onyx Void HQ. Follow the waymarker again by pinging it with the corresponding button you need to press until you reach the terminal that's linked to the Blimp Traffic Control Node. When you arrive, activate the bridge terminal to cross and then hijack the traffic control node to create a diversion - a short cutscene will trigger and your IMP will tell you that there's an alternate route that will take you to the back of the restricted section.

Again, ping the location and follow your waymarker until you reach the back entrance. You'll now find yourself at a locker room, check the lockers on the right to find some UCREDs and on the left on a shelf is x1 Advanced Component. After grabbing the item, head up the stairs and go inside the next room. Check the first room on the right to find x1 Skill Point on a table, the gym room doesn't have anything, so check the one at the end of the hallway which is a shooting range room to find a P9000 Roomsweeper - after clearing the area, follow the waymarker and you'll trigger a cutscene where you'll see 438 Hung speaking to a woman.

After the cutscene, head down to the room where 438 Hung was and access the subnet terminal to download the coordinates of the shipment you are looking for. After the IMP confirms the location, before going back outside from the back entrance, go south through the exit and go through the common area of the headquarters. Check the kitchen and you'll find a GR8 GFragmost Grenade tactical item on the counter - after grabbing the item, exit through the back entrance and proceed to the Dream World club that's located in the CorpZone.
The Dream World Club

Be sure to prepare for this section since you'll fight against multiple enemies in the club such as Turbo Thugs, the Rojin, and a few Hammerhand enemies. Equip your strongest ballistic-based attack weapon here (a Shotgun and Machinegun weapon is recommended), bring the Rejuv Field tactical item if you want to have sustainability, and for Augmentations, Hyper Focus is a good augment to have since you can stop slow down incoming bullets, while having the Mono Ranger agument can assist you in combat.

After killing all the enemies in the club, go to the back exit and you'll see the target escaping. You're now tasked to follow The Shipping Master, go through the spa which is just infront of you and follow the waymarker. Inside the establishment Deragota, you'll encounter more enemies here. Once you've killed the first batch of enemies, by the jacuzzi section, on the left, you'll find a red chest containing x1 Life Transfer Augmentation item. Next, proceed to the lockers section and kill the rest of the enemies. Don't forget to open the lockers to find UCREDs and random items, there's also an ED-30 Fintech Trousers on a bench inside the locker room - from here exit the spa and proceed to the helipad where you'll see an OV Drop Ship fly away as you arrive.
Stop the Shipping Master

You now need to stop the shipment from leaving and by doing so, travel to the docks of The Cosmodrome. You can fast travel there by train or taxi. Simply kill all the enemies you encounter and follow the waymarker until you reach the designated docks where the ship is about to take off, which is Docking Bay 94.

Upon reaching the docking bay, head to the terminal and before hijacking it so that you can shut the gate, there's a red chest next to it which contains a PF-40 Velocity Helmet. After grabbing the item, interact with the panel and you'll see the ship crashing and hitting the gate. Now, make further preparations before heading down the ship. Make sure you have an energy-based weapon equipped, have the Mono Ranger augment, and for the rest, it's up to you on the Modules and Tactical Items you want to have equipped.
Boss Battle: X-28 Havoc

Get ready to fight agiainst the X-28 Havoc. This boss can easily be defeated IF YOU ARE USING THE RIGHT WEAPON TYPE AGAINST IT. For this battle, you want to have an energy-based weapon since you are fighting a mechanical-type boss. The Mono Ranger can be helpful here since it draws the attention of the boss and it shoots energy rounds from its gun. This boss only has three attacks, first is a barrage of large missiles which you can easliy identify where it will land, just make sure you are not within its blast radius to avoid getting hit.

For the second attack, it will shoot a cluster of smaller missles which covers a large area. When this happens, again, make sure to dodge away from the blast radius. You'll easily see it marked on the ground in small circles. As for its third attack, it will summon these small wheel mecs that work similar to the small spiderbots when you fought the Megarachnoid.
When you see those small red dots appear on the mini-map quickly take it out! If you have the Mono Ranger on the field, then it can draw its attention and you can shoot it down while it's distracted, The Havoc likes to fly up into the air, so make sure to press the Right Mouse Button so that you can aim up and shoot - defeat this boss to board the wrecked ship and to obtain a Propulsion Leap augment that's dropped by this boss.

Upon entering the wrecked ship, you'll trigger a cutscene where you'll find the shipping master. Kira then arrives at the scene where your character hands over The Shipping Master's head as "data" that she requires you to obtain. You'll complete this mission after the cutscene and will be rewarded with 65,000 XP - up next is Trace Protocol.
Trace Protocol
Trace Protocol |
|
|---|---|
 |
|
| Mission Type | Main Mission |
| Location | RezDev |
| REC. Level | Level 17 |
| Boss | Celine |
| Reward/s | 150,000 XP |
| Prev. Mission | Foreign Code |
| Next Mission | Syntax Error |
Trace Protocol is a Main Mission in The Ascent. Main Missions mainly focus on progressing the main campaign and story of the game where you explore the world of Veles to find out what has happened through the arcology. Completing missions grants various rewards such as Weapons, Armor, and more, but most importantly, it yields EXP that is allocated into leveling up the player's character.
The player tracks the abducted off-world scientists through the Pleasure Disctirct and into the Medical/Science District, where all traces come to a sudden end in the heavily secured Exotic Materials Laboratory.
Trace Protocol Objectives
- Speak to Kira
- Find Lanier
- Speak with stackBoss Poone
- Gain Entrance to the Stimtown
- Deliver the package to Spice
- Investigate the Dirty Dive Bar
- Speak with Trenning
- Locate Lanier's Apartment
- Access Surveilance System
- Gain Entrance into the exMat Lab
- Access the exMat Lab Mainframe
- Appropriate the exMat Lab
- Access the exmat Lab Mainframe
Trace Protocol Items
- Plug
- Visitor
- The Fist
- Pocket Mech
- The Minor Note
- AT4 Auto Turret
- G92 EMP Grenade
- HMG42 Dominator
- PF-20 Vitaltraxx Vest
- GR8 Fragmost Grenade
- PF-40 Habprotector Vest
- Joyrunner Jacker Harness
- E-50 Panaware Sensor Suite
- E-40 Redrunner Smooth Top
- ED-50 Urban Operator Leggings
Trace Protocol Related NPCs
Trace Protocol Enemies
Trace Protocol Walkthrough
Gain Access to Stimtown

This mission becomes immeditaely available after completing Foreign Code, travel by foot or fast travel via Taxi or Train back to Cluster 13 and speak to Kira who's at the yCorp HQ so that you can acquire your next job which is to find Loura Lanier. Your IMP will then thell you that there's a small roadblock regarding entering Stimtown and that you have to find another way, shortly after, you'll receive a message from stackBoss Poone, asking you to meet him at Serenity Plus because he can help you get through if you do a small favor for him.

Head to Serenity Plus bar in Cluster 13 and speak to Poone who's at his usual table. He'll ask you to deliver a package to a bartender named Spice who's at the Loading Bar. After speaking to Poone, head out to the west exit of Cluster 13 and pass through the Rooftops until you reach the gate leading to Stimtown. Speak to the guard named Warton and tell him that Poone sent you, he'll then give you a lifetime access so that you don't need to bother him next time.
Find Lanier

You'll now have access to Stimtown, you can find some Side Missions here and if you've got the One More Rep side mission, you can find Merle here and ask him for a steroid that has a lighter substance which you can give to Atticus later on. Head to the Loading bar and speak to the bartender, Spice. Provide the package and he'll tell you to check out The Dirty Dive to find Lanier.

Go outside the bar and follow your waymarker to The Dirty Dive bar. Along the way, if you look for a club named "Wandas" where you'll see a group of people dancing by the entrance, you'll find a Skill Point next to the bouncer on the left. Wandas is on the east side of the map. After grabbing the item, head to the Dirty Dive which is on the west, head inside and before going up, you can find The Fist shotgun weapon on the ground floor near the steps on the eft and a G92 EMP Grenade near the shop on the right. Next, go up and speak to woman named Palu who's by the bar - you'll learn that Lanier has a penthouse in Blossom Hills.

Head outside the bar and from here, you can fast travel by taxi or train to Cluster 13 or better yet, the Pod Lot. When you arrive, follow your waypoint to reach Blossom Hills. Your next task is to find Trenning and ask about where you can find Lanier's penthouse. Just be cautious when you are running around the area since it is the Turbo Vipers' territory and there are Turbo Thugs around.

When you reach the taxi establishment where Trenning is, as you go through the large gate, turn right and go up the steps first, you'll find a red chest containing a Basic Component and next to the office (outside) where Trenning is, there's an AT4 Auto Turret, as well as a chest - after grabbing the items, go inside the office and speak to Trenning.

You now have the coordinates of Lanier's penthouse. Simply follow it with your waymarker by pinging it. Head to the apartment building and the first door on the left is Lanier's penthouse. There are a couple of things that you can find here, by her work station on the right side of the penthouse, there's a Basic Component on the shelf, on the second floor where her bedroom is, there's a chest near the bathroom door. and near the bed is another chest that requires you to hack it with an ICE -1. That chest contains an advanced component, and inside the bathroom, there's a skill point on the sink.

Once you've grabbed all the items, go back down the living room and investigate the body. You'll learn that it's Lanier and that she's been killed not too long ago. Your IMP will then advise you to check the security footage which is also in the same building. Go outside and walk to the end of the hallway, hack the terminal so that you can gain access to the surveillance system. Inside the surveillance room, you can find a Cyberdeck upgrade, the Plug. Grab it and then access the computer to investigate the footage showing Lanier being killed. Kira and your IMP then advises you where to go next, which is to investigate the exMat Lab located in RezDev - fast travel or proceed by foot to The Warrens, ride the lift to Highstreet, pass through The Umbilical while you also fight against enemies until you reach the RezDev.

Enter the lab and follow the waypoint that will take you to the exMat Lab Mainframe. You need to hack into it to gather the information needed by Kira. Just be cautious since there are enemies here as well. When you enter, go straight from the lobby, hack the first door on the right and you'll find a chest containing a Sidearm weapon, The Minor Note. Once you've grabbed it, proceed to the lab's mainframe and defeat the enemies you encounter.

When you're at the mainframe, if you look at the left side, you'll find another Cyberdeck upgrade, the Visitor. Pick it up and then access the mainframe, of course it won't be that easy since you won't be able to gain access. Kira then calls you and asks you to appropriate the lab's SI so that yCorp's AGI can completely hijack into its system. Follow the waymarker and look for the terminal that's linked to the SI. Now, be ready for this section since once you start imprinting, you'll have to withstand enemy forces that will arrive, as well as a boss encounter for the next 3 minutes.
Boss Battle: Celine

Now for the first minute, you'll need to withstand enemy forces. We suggest that you keep an eye on the mini-map so that you can identify which side will the enemy come from. As far as equipment goes, have at least one strong Ballistic and Energy-based weapons equipped since you'll be fighting against both mechanical and humanoid enemies. For Tactical Items, bringing the Rejuv Field will help you in terms of survivability. As for Augmentations, better to have Hyper Focus to help you with slowing down incoming bullets and the Mono Ranger to help you fight. Remember, keep moving, keep shooting, and use cover if necessary.

Once the timer has passed around a minute, a shortcutscene will trigger and a mech that is controlled by Celine will arrive. Now, this part can be quite annoying since apart from Celine, you need to deal with incoming enemy forces and they'll just keep coming until the timer appropriation process is complete. This is the part where you really need to keep moving around the area as you try to kill the Ascenders first. A good way is to head towards the entrance and use that as a way to go around a loop as you go up and down the stairs and kill the enemies within your sights.

Take out all of the enemies first and then shift your attention to Celine. Celine has two attacks, first is where she launches landmines. You can identify where it lands since it shows a red circle on the ground, you just need to avoid going near it and wait for the timer to run out so that it sets off on its own. The other attack is where she shoots out an energy beam in a straight line.You want to avoid this attack since it can deal a lot of damage.
You can hide behind cover if you are cornered, but its best to keep running around her in circles as you also try to maintain a good distance. Apart from that, she can also go invisible, but you'll still be able to see her in cloak form, just keepo shooting her so that the mech comes out from being cloaked - defeating her drops the Pocket Mech tactical item. After defeating Celine, go back to the exMat Lab mainframe and hijack into it - doing so completes this main mission and rewards you with 150,000 XP, up next is Syntax Error.
Syntax Error
Syntax Error |
|
|---|---|
 |
|
| Mission Type | Main Mission |
| Location | The Pinnacle |
| REC. Level | Level 20 |
| Boss | n/a |
| Reward/s | Character XP |
| Prev. Mission | Trace Protocol |
| Next Mission | Recompile |
Syntax Error is a Main Mission in The Ascent. Main Missions mainly focus on progressing the main campaign and story of the game where you explore the world of Veles to find out what has happened through the arcology. Completing missions grants various rewards such as Weapons, Armor, and more, but most importantly, it yields EXP that is allocated into leveling up the player's character.
All roads lead to the top, I am going to the Ascent Group HQ at the Pinnacle level of the Arcology to find out what is going on with the kidnappings and what is MenShen?
Syntax Error Objectives
- Use the Holophone
- Reach the Pinnacle Tier
- Retrieve Grateful Abbott's FOB (1/1)
- Return to Grateful Abbott
- Go to the Ascent Group HQ
- Reach the Boardroom
- Interface with the AGI
Syntax Error Items
- Diva
- Hyper Focus
- PF-20 Vitaltraxx Vest
- MG1000 Strikebreaker
- PF-40 Velocity Helmet
- PF-40 Habprotector Vest
Syntax Error Related NPCs
Syntax Error Enemies
Syntax Error Walkthrough
Find a Way to Reach The Pinnacle

This mission becomes immeditaely available after completing Trace Protocol, you'll still find yourself at the exMat Lab, in the previous room from where the terminal is, you need to call Kira via holophone so that she can brief you with your next job. You now need to reach the board members of the Ascent group which is located at The Pinnacle. To get there, simply go outside of the lab first and then take a cab to Highstreet, from there, go east towards the Arcology and you'll trigger a cutscene where you'll find the Grateful Abbott.

So it seems like Abbott is having a hard time trying to gain access since he lost is FOB and he needs it in order to get through. Grateful Abbott then asks you to find his FOB and he'll help you gain access to The Pinnacle, he also tells you that the Rojins have it and that it's back at the Corpzone.
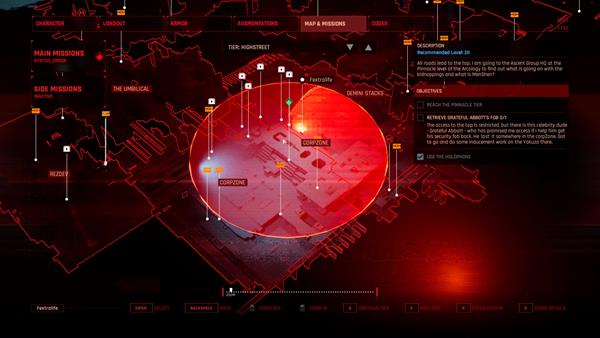
After the cutscene, travel by foot or fast travel via taxi or train to the Corpzone. Now, simply ping the waymarker and head towards the marked area, you just need to go around and fight the enemies you encounter. The FOB is being held by a random enemy but your IMP will notify you once the enemy holding it is killed and drops the FOB . Once you obtain it, fast travel back to Highstreet and give Abbott the item - you'll now be able to reach The Pinnacle.
Reach the Ascent Group HQ

Now, you've reached The Pinnacle. Before you follow the waymarker and try to reach the Ascent Group HQ. Go to the east side of the area towards the overlooking park. You'll find a Cyberdeck upgrade there which is the Diva. It's at the right end side of the park as indicated on the image above - grab the item and then proceed to the Ascent Group HQ.

Prepare for battle here since there are multiple mechanical enemies such as the Light Monobot, Heavy Monobot and the establishment's defense system. Using your strong energy-based weapon will easily take out these enemies, and bringing the Augmentations Hyper Focus and Mono Ranger will help in survivability. Hyper Focus can slow down incoming bullets and the Mono Ranger will guide you in combat - simply kill all the enemies at The Grand Alley and head towards the Ascent Group HQ.

Next, go straight and reach the entrance of the boardroom where you'll find that it's locked due to it being on lockdown. Kira then tells you that it can only be opened via the Ascent Group's AGI. Go east, down the hall, and you'll find the room holding the AGI at the end of the hallway. The room before the AGI, you can find an Advanced Component on the shelf behind the desk, and inside the AGI room, just by the entrance is a Superiror Component. Once you've grabbed both components, approach the AGI and start the interface to trigger a cutscene. This also completes this main mission where Kira arrives and briefs you for your next task. Completing this mission rewards you with a large amount of XP - simply speak to Kira who's at the AGI room to trigger the next mission, Recompile.
Recompile
Recompile |
|
|---|---|
 |
|
| Mission Type | Main Mission |
| Location | Deepstink |
| REC. Level | Level 21 |
| Boss | n/a |
| Reward/s | 200,000 XP |
| Prev. Mission | Syntax Error |
| Next Mission | Board Meeting |
Recompile is a Main Mission in The Ascent. Main Missions mainly focus on progressing the main campaign and story of the game where you explore the world of Veles to find out what has happened through the arcology. Completing missions grants various rewards such as Weapons, Armor, and more, but most importantly, it yields EXP that is allocated into leveling up the player's character.
A journey back down into the sublevels of the Arcology to restart the Ascent Group AGI.
Recompile Objectives
- Speak to Kira
- Reach the AGI Cognitive Core
- Go to Coder's Cove
- Speak with Noghead
- Reach the AGI Cognitive Core
- Reboot the AGI
- Return to the Ascent Group HQ
- Interface with the AGI
Recompile Items
- Dread
- Mono Ranger
- E77 Superior
- Mono Defender
- Shockwave Grenade
- E-30 Datacrunch Visor
- E-40 Redunner Compression Pants
Recompile Related NPCs
Recompile Enemies
- Ferals
- Logbot
- Papa Feral
- Turbo Thugs
- Black Hacker
- Hammerhand
- Megarachnoid
- Light Monobot
- MG Operatives
- Onyx Void Operative
- Ascender Combatants
Recompile Walkthrough
Head to the Coder's Cove

This mission becomes immeditaely available after completing Syntax Error. You'll find yourself and Kira in the AGI room of the Ascent Group HQ. Speak to Kira for a briefing of your next task and to formally trigger this main mission. After speaking to her, you'll learn that you need to gain access to the AGI Cognitive Core, and by doing so, you will need the help of Noghead. Simply travel back to The Warrens' arcology and fast travel by train or taxi to Black Lake Tower and then to Coder's Cove to meet up with Noghead.

Upon arriving at the entrance of the Coder's Cove, a short cutscene will trigger where you'll see Onyx Void Operatives who are waiting to ambush you. You'll now have to fight against the group, as well as a couple of Turbo Thugs. Now, there's a new enemy here called the Black Hacker, it moves similar to the Combat Hacker but it's more fast when it comes to attacking.

Take out the hacker first when you spot it. Usually, you'll find it hiding around or behind cover. You can counter-attack it when it tries to hack you by pressing the cyberdeck button. You'll know when it tries to hack you when a yellow digital dome appears around your location, either use your Cyberdeck to counter-attack or dash away from the dome. If ever you see these drones that are negating your attacks since it's protecting the enemy it's attached on, you can hack it and then shoot it down - simply kill all the enemies and then head inside the Coder's Cove.

Speak to Noghead who's at his station and he'll give you the coordinates of the Ascent Group's AGI. Go back outside of the Coder's Cove and then take a taxi to fast travel to The Warrens. From there, go east and ride the arcology down to the Deepstink and then take the central lift leading to dNexus. You're basically going back to the area that you previously went to during the Main Mission: Empowerment.
Reach the AGI Cognitive Core

Now, you may want to equip your strongest energy-based Weapon since the enemies you will encounter here are all mechanical enemies. Simply follow the waymarker by pinging it, as well as fighting through enemies such as automated defenses, Light Monobot, Logbot, mechanical Hammerhand, and the return of one of the most annoying enemies in the game, the Megarachnoid. The Megarachnoid won't appear here as a boss, but instead, as an elite enemy. Havint the following items equipped will help you in beating the large spider-mech, Mono Ranger, Rejuv Field, and a strong energy-based firearm.

Simply defeat all the enemies you encounter until you reach the AGI Cognitive Core. When you're ready, interact with the terminal to reboot the cognitive core and prepare to fight enemy reinforcements while you wait for the reboot process to be completed. You need to survive and wait for 3 minutes and 15 seconds as you go up against Onyx Void Operatives, MG Operatives, and Ascender Combatants. You'll need the Hyper Focus augment here if you're playing solo so that you can slow down incoming bullets - simply wait for the process to finish and kill all the remaining enemies to obtain your next task.
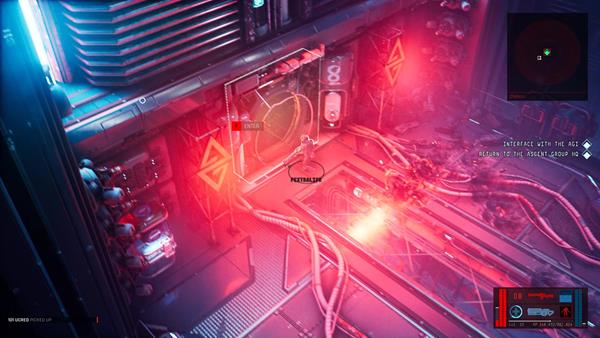
Now, you need to return to the Ascent Group HQ which is at The Pinnacle. You may think it's a long travel back, but luckily, Kira tells you that you have access to the executive elevator in the dNexus that can take you directly to The Pinnacle. Simply follow the waymarker by pinging it to reach the nearby lift. From there, enter the Ascent Group HQ and a cutscene will trigger where Kira finds clues as to what happened from the AGI - you'll complete this main mission and obtain 200,000 XP as a reward.
Board Meeting
Board Meeting |
|
|---|---|
 |
|
| Mission Type | Main Mission |
| Location | Ascent Group HQ |
| REC. Level | Level 22 |
| Boss | 438 Hung |
| Reward/s | 250,000 XP |
| Prev. Mission | Recompile |
| Next Mission | Root Access |
Board Meeting is a Main Mission in The Ascent. Main Missions mainly focus on progressing the main campaign and story of the game where you explore the world of Veles to find out what has happened through the arcology. Completing missions grants various rewards such as Weapons, Armor, and more, but most importantly, it yields EXP that is allocated into leveling up the player's character.
Time to see the Ascent Group board and get some answers.
Board Meeting Objectives
- Reach the Boardroom
- Override the lock
- Defeat 438 Hung
Board Meeting Items
- x1 Skill Point
Board Meeting Related NPCs
Board Meeting Enemies
- 438 Hung (Boss)
- Hung's Left Hand
- Hung's Right Hand
Board Meeting Walkthrough
Investigate the Boardroom

This mission becomes immeditaely available after completing Recompile. You'll already be at the Ascent Group HQ, so all you need to do is head to the entrance of the boardroom. Once you're in, look to you left, and you'll find x1 Skill Point on the reception desk. Grab it and then move forwerd the boardroom's main door - your IMP will tell you that you need to override it to unlock the door.

From where you grabbed the skill point, go back to the reception's desk and interact with the security console behind the desk. This unlocks the door and you can now go inside the boardroom. A cutscene will then triiger where you'll find the members of the board dead. Kira then asks you to access the board room console to download the telemetry to witness what just happened - after learning about what transpired, a ship crashes through and 438 Hung appears who is eager to take you out.
Boss Battle: 438 Hung

For this boss battle against 438 Hung, he'll be accompanied by his left hand and right hand. The goal here is to take out his two minions first since one of them will try to hack you which can be a bit irritating if you don't take the hacker out first. Hung's Right Hand is the hacker, while Hung's Left Hand is the one fighting with firearms. Kill the right hand first, then the left hand, and then you can focus on defeating 438 Hung. If you see a mini drone that's following Hung or either of the right or left hand, you need to hack it with your Cyberdeck and shoot it down to stop it from negating your attacks.

As for Hung, he mainly has three attacks. One is where he slams his hammer on the ground and it creates a shockwave that goes out onto three directions in a straight line.Simply dash backward to avoid getting hit or if you're stuck in a corner, use th gaps between the shockwaves to avoid it. Second, he leaps into the air and lands on top of you, again dash at any direction just when he's about to land to avoid getting hit. And as for his third attack, he throws out a single bomb that tracks you.

You can shoot it down or bait it so that it lands on a surface. 438 Hung is not a mechanical enemy, so using a strong ballistic-weapoon or even a strong Excessive Weapon will be effective against him - simply defeat him to complete this mission.

Once you've defeated him, another cutscene will trigger and Kira will brief you with your final mission with the yCorp which is to locate project MenShen and to stop Dakyne from opening the gate. You'll be rewarded with 250,000 XP for completing this main mission - up next is
Root Access
Root Access |
|
|---|---|
 |
|
| Mission Type | Main Mission |
| Location | Sub Sector 41A |
| REC. Level | Level 23 |
| Boss | Siege Mech |
| Reward/s | 300,000 XP |
| Prev. Mission | Board Meeting |
| Next Mission | Unhandled Exception |
Root Access is a Main Mission in The Ascent. Main Missions mainly focus on progressing the main campaign and story of the game where you explore the world of Veles to find out what has happened through the arcology. Completing missions grants various rewards such as Weapons, Armor, and more, but most importantly, it yields EXP that is allocated into leveling up the player's character.
Going into the lower maintenance levels where Project MenShen facilites are lcoated. I am to expect heavy resistance from both the Ascenders and Onyx Void.
Root Access Objectives
- Go to Deepstink Level
- Reach Lower Maintenace Levels
- Ener MenShen Facilities
Root Access Items
- Superior Component
- Advanced Component
- EBR Enforcer
- ED-50 Urban Operator Leggings
Root Access Related NPCs
Root Access Enemies
- Ferals
- Logbot
- Scatters
- Papa Feral
- Siege Mech
- Hammerhand
- Megarachnoid
- Light Monobot
- Ascender Combatants
Root Access Walkthrough
Head to Deepstink Level

This mission becomes immeditaely available after completing Board Meeting. Take the executive elevator from the Ascent Group HQ an pass through the dNexus to reach Deepstink. You'll need to pass through the Waste Recycling Network and Sub-Sector 41A to reach xx. If you remember, the location you need to reach is the where you first met Trummer in his office during the first Main Mission, Arcology Blues - now, before you proceed to the Deepstink level, we highly recommend that you upgrade all your equipment and visit any Merchant you need since you'll be travelling at the lower-most section of the Deepstink in search for the MenShen Facility.

Along the way, you'll encounter Ferals and a few Papa Feral in the Waste Recycling Network. Fight your way through until you reach the entrance of Silo 86 which is at Sub-Sector 41A. Simply interact with the terminal to authorize your entry. Now, the Ferals here are a bit high level compared to the ones you encountered and there are a lot here. So make sure you have a strong Ballistic Machinegun weapon so that you can easily kill the horde. Another tip is to use the Spiderbots augmentation since the explosion can hit multiple enemies at once.

Near the entrance of Silo 86, there's a locked door on the south section of the map. You can hack the door that requires ICE 1 for unlocking doors and by now you should have at least ICE 2 for hacking doors. Behind the door is a private resting area where you can find a Grafter and certain items such as a Superior and Advanced Component - there's also lockers here which you can check to find UCREDs, after checking the room proceed to the marked objective and fight your way through hordes of Ferals.
Enter the MenShen Facilities

Now, at the lower-most section of Silo 86, head northeast on the map to find more items such as a Skill Point and an advanced component. After grabbing the items, ping your waymarker and follow it to reach entrance of the MenShen Facility. Take note that when you're near the entrance, you will be fighting mechanical enemies such as Light Monobot, Logbot, Megarachnoid, and the Siege Mech, as well as Ascender Combatants so make sure you have a strong energy and ballistic firearm Weapons so you can easily adapt depending on the enemy you are fighting.

When you're near the entrance (you'll know when you see Ascender Combatants), be ready to fight two Siege Mech enemies, alongside more Ascender Combatants. To set-up, you can hack the two sentry turrets so that it can help you in fighting the enemies. Try to bait the enemies near the turret and then be ready to fight. Make sure you have Rejuv Field equipped so that you can heal up, and have Hyper Foucs to slow down incoming bullets. Simply defeat the enemies and pass through the entrance of the Menshen facility to reach MenShen itself - you'll then complete this main mission, obtain 300,000 XP as a reward and unlock the next and final mission, Unhandled Exception.
Unhandled Exception
Unhandled Exception |
|
|---|---|
 |
|
| Mission Type | Main Mission |
| Location | MenShen |
| REC. Level | Level 25 |
| Boss | n/a |
| Reward/s | 500,000 XP |
| Prev. Mission | Root Access |
| Next Mission | New Game Plus |
Unhandled Exception is a Main Mission in The Ascent. Main Missions mainly focus on progressing the main campaign and story of the game where you explore the world of Veles to find out what has happened through the arcology. Completing missions grants various rewards such as Weapons, Armor, and more, but most importantly, it yields EXP that is allocated into leveling up the player's character.
I am inside. The only way out of this is to see through to the end.
Unhandled Exception Objectives
- Reach the MenShen Antechambers
- Close the MenShen Gate
Unhandled Exception Items
- Items that drops from the enemies here are Random
Unhandled Exception Related NPCs
Unhandled Exception Enemies
- Ferals
- Scatters
- Barrager
- Papa Feral
- Turbo Thugs
- Turbo Keesh
- Black Hacker
- Hammerhand
- MG Operative
- Ungrateful Merc
- Onyx Void Operative
- Ascender Combatants
Unhandled Exception Walkthrough
Reach the Antechamber
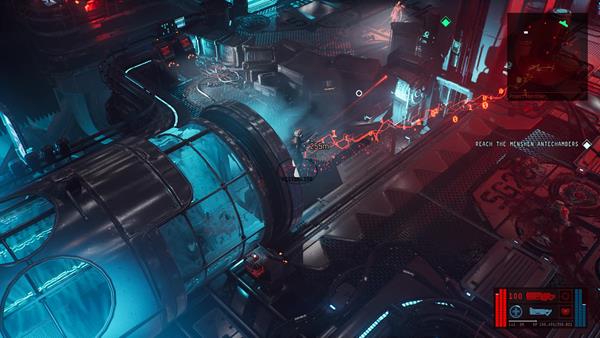
This final mission becomes immeditaely available after completing Root Access, you'll now find find yourself at the MenShen facility itself. The area is swarming with Ascender Combatants and other enemies, so make sure you have the Hyper Focus augmentation with you so that you can slow down incoming bullets. The Rejuv Field tactical will help you as well for sustainability and have a strong ballistic and energy weapon equipped.

Follow the waymarker by pinging it until you reach a large gate leading to the antechamber which is locked. Your IMP will tehll you that it is magnetically locked and you will need the help of Noghead to unlock it. He'll tell you that you need to be within the area or simply close to the door as you fight through enemy reinforcements for a total of 1 minute and 30 seconds. Simply stay within the range which is indicated with a white circle on the ground, while you also defeat and clear out the enemies. Once the override is complete, you just need to go through the door ahead to reach the antechamber - some tips, bring a Machinegun weapon and Shotgun, equip the Rejuv Field tactical, Spiderbots and Razor Dronettes for the battle ahead.
Close the MenShen Gate

Now, your goal is to override four access pannels to close the MenShen gate before the time runs out. And if you're playing solo, it won't be that easy! Once the battle starts, you'll see Dakyne here but she's easy to kill. Just use a ballistic-type weapon and shoot her down. What you want to watch out for is the never-ending horde of Ferals. That is why you need the Shotgun to kill multiple of them at once if they're near and the Spiderbots and Razor Dronettes augmentations since it has a short cooldown and can take out enemies that are grouped.

Position yourself near the first panel which is on the far left side near the gate. When the coast is clear, take the brief window to override the panel. If you're low on health, a tip here is to throw your Rejuv Field while you are trying to discharge the panel, and then use Razor Donettes or Spiderbots so that it can stop the Ferals trying to attack you. After you discharge the first panel, the combat gets tough. A Scatter, a couple of Ascender Combatants wielding assault rifles, and of course more Ferals will appear - take out the enemies and when the coast is breifly clear, discharge the second panel on the right from the first panel.

Once you've dischared the second panel, more difficult enemies will appear such as MG Operatives, a Dozer, a Papa Feral and more Ferals. Keep moving is another key here, if you need to take a break, pause the game if you must or hide behind cover if you've made a safe distance between the enemies coming after you. Before you discharge the third panel, you want to take your time here because a Papa Feral will spawn here in the middle of the battle. Another tactic you can do is killing the Ferals will help you farm and recharge the tactical gauge.

Upon discharging the third panel, things get tough from here since the game will throw everything at you. What you want to watch out for now are two Black Hacker enemies. TAKE THEM OUT ASAP. You'll find them hiding behind cover, so when you spot them, switch to a shotgun and even combo with Razor Donettes or Spiderbots to take them out easily. Once you've dealt with the hackers, everything you should be smooth for you, just take your time to kill the rest of the enemies such as the Ungrateful Merc and more Ascender Combatnants - race towards the last panel when the coast is briefly clear and discharge it to complete this final mission.

A cutscene will automatically trigger after you discharge the last panel and fully closing the gate. Kira and her reinforcements will arrive and she will tell you that your contract with yCorp has been fulfilled and from here on, you are an independent contractor. Congratulations! You've beaten the main campaign, now, what's next? You can visit our New Game Plus page to learn more about the assets and features that are carried over after you finish the story. If you want to check the list of all missions, check out our Missions page - you'll return to Cluster 13 after the post-credits scene and obtain 500,000 XP as a reward.

On the ps4 here, on the first mission those ferals wont take damage is that a known bug?
0
+10
-1