Mutual Dependencies |
|
|---|---|
 |
|
| Mission Type | Main Mission |
| Location | Grinder |
| REC. Level | Level 3 |
| Boss | n/a |
| Reward/s | 10,000 XP |
| Prev. Mission | Arcology Blues |
| Next Mission | Trading Places |
Mutual Dependencies is a Main Mission in The Ascent. Main Missions mainly focus on progressing the main campaign and story of the game where you explore the world of Veles to find out what has happened through the arcology. Completing missions grants various rewards such as Weapons, Armor, and more, but most importantly, it yields EXP that is allocated into leveling up the player's character.
With corpSec mostly gone due to the bankrupcy, it falls on each stack to fend for itself. In their current state, they're extremely vulnerable to approriation by a rival Corp craving more indent workers, or even Onyx Void looking to boost their black-market organ and aug trade.
The Ascenders has sent some emergency supplies (and a couple of lesser influencers hoping to recruit more Subs), but it's not nearly enough, and most IoHab indents don't trust the Cult's intentions anyway.
stackBoss Poone, has contacted the informal leaders of the neighboring stacks and suggested a IoHab alliance. A meeting is to be held in the neutral Pleasure district, where they are to hammer out the details.
Mutual Dependencies Objectives
- Speak with Stackboss Poone
- Go to the Grinder District
- Kill the Fullchromes (4/4)
- Go to the Meeting Location
- Defeat the Attackers
Mutual Dependencies Items
- Shirt Skin: Canary
- Dread
- Riot Gun
- P1 Protector
- Maser Squint Visor
- Deepstink Rebreather
- PF-10 Supervisor Hat
Mutual Dependencies Related NPCs
Mutual Dependencies Enemies
Mutual Dependencies Walkthrough
Speak to Poone

This mission immediately becomes available after completing Arcology Blues. You'll find yourself in Cluster 13 as you finish rebooting the SI in the waste disposal area. Simply head up to Serenity Plus and speak to stackBoss Poone to gather intel about the new job. After speaking to him, there's a mean next to Poone's table where you'll see a diamond icon on top of his head. Speak to him and accept the side mission, Gear Up!
Side Mission: Gear Up!

The man you speak to identifies you as Poone's new pet, he then hands you over 12,000 UCRED so that you can use it to visit the Grafter, the Armor Dealer, and Weapons Dealer so that you can buy new upgraded gear. The objective is very simple, just simply visit all three merchants and it is optional if you want to buy new Weapons, Armor, or have new Augmentations implanted. Do this side mission first and complete it before heading over to the Grinder District - it is recommended that you at least buy upgraded armor pieces to increase your defenses since you'll be fighting a lot of enemies during this main mission.
Head to the Grinder District

Once you're done visiting the merchants around Cluster 13, proceed to the main mission's objective which is to infiltrate the Grinder District. Follow the waymarker and you'll reach the Rooftops of Cluster 13. Step onto the lift and ride it down. Approach the helipad on the left and you'll see a chest containing some UCRED and a Maser Squint Visor.

From the helipad, if you go right, and down the stairs, you'll find an abandoned shop that you can go inside. By the door, there's another chest containing UCREDs and inside, there's a datapad for you to read, as well x1 Basic Component. Outside by the other door, there's also some crates that you can destroy to find some UCREDs and a Shirt Skin: Canary. From here it doens't really matter which path you take since it will both lead you towards the first section of the Turbo Viper's hideout - your primary goal is to kill any enemies you encounter, reach the art gallery of the Grinder District, and secure the area for Poone.

Reaching further into their hideout in the Gratitude becomes tough since you will encounter more gang members. A good tactic to avoid death is to use covers and shoot while you are behind obstacles. This way, you can deal damage while protecting yourself from enemies that are using firearms. Keep an eye out as well to your surroundings since you can shoot explosive barrels and vehicles and make these objects explode, instantly killing or inflicting a large amount of damage to enemies caught within the blast radius - just take note that you can also get damaged if you get hit by the blast.
Reach the Grinder

You'll arrive at the innermost section of the gang's area, No Man's Land. There will be more Turbo Thugs here, so be ready to take cover and shoot down the enemies. One of the thugs here will drop a new weapon that you can use, the Dread. Proceed to the marked objective as you fight your way through the gang memebrs in No Man's Land until you reach the Grinder. When you reach a certain point of the Grinder, Poone will warn you about the Turbo Vipers going all in to kill you, and that they've deployed their leash-holding fullChromes - your next objective now is to take out x4 of these enhanced humanoids.

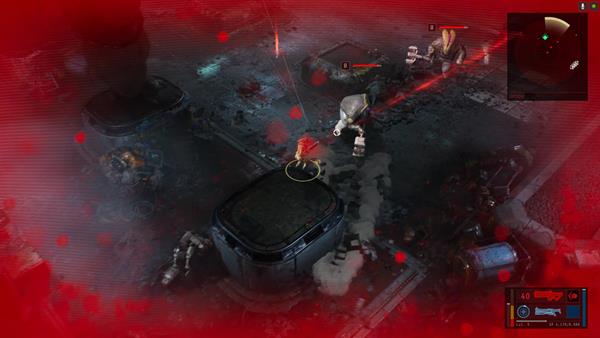
There are four Fullchromes that you need to kill and they're all around the Grinder area. All four of these are accompanied by a group of Turbo Thugs, so what you want to do is to take out the thugs first as fast as you can so that you can priamrily focus on taking out the Fullchrome humanoid. You'll know when there's a Fullchrome nearby when there's a red skull indicator on top of the enemy's head.
[Known Glitch: 8.7.2021 - Fullchromes Not Spawning]: A number of players have encountered a soft or hard lock at this point in the game. If the FullChromes don't spawn, you'll find the story progression locked at this point. Some users have had success leaving the area, quitting out of the game, reloading & returning to the area. After a few tries of this - if they haven't loaded in, your character is hardlocked and you'll need to create a new character or play in other friends' games. As of 8.13.2021:5:00 CST this issue still hasn't been patched and no announcements have been made as to when this particular glitch will be addressed.

The Fullchrome wields a rocket launcher that tracks your movement until it comes into contact. So that's why you need to kill all the thugs first so that you can watch out for those annoying rockets. At some point, the Fullchrome will also fall to the ground for a brief moment where it looks like it is overheated and it tries to reboot. When this happens, take the advantage to shoot it down and kill it. Take out all four Fullchromes, head to the art gallery and secure the area.
Stand your Ground!

Upon entering the art gallery, a short cutscene will trigger where you'll see more Turbo Thugs reinforcements arrive. Poone then asks you to defend the area as they try to make it, but really, you'll just be fighting the enemies here on your own. Kill multiple thugs here and eventually, another short cutscene will trigger where two brute enemies will appear, the Hammerhand.

Take out all of the thugs first as fast as you can before fighting the two Hammerhand. The Hammerhand are just elite enemies but they have two unique attacks where they slam their large hammer on the ground which causes a line of shockwave towards your direction and they charge forward at you like a bull. The key here is to maintain a mid-distance and shoot them down. if you have the Dread AR, use it since it has more damage, and you can also throw a Shockwave Grenade to temporarily stun them.

Hiding behind cover will not work against them since the shockwave attack goes through walls, SO KEEP MOVING WHILE YOU SHOOT. Defeating all enemies will trigger a cutscene and complete the mission , and you'll be rewarded with 10,000 XP - from here, you can take the interlink back to Cluster 13 and speak to stackBoss Poone.
Mutual Dependencies Notes & Tips
- ??
- Notes, Tips, and other info goes here
