Empowerment |
|
|---|---|
 |
|
| Mission Type | Main Mission |
| Location | RBM-5 |
| REC. Level | Level 11 |
| Boss | Megarachnoid |
| Reward/s | 30,000 XP |
| Prev. Mission | Trading Places |
| Next Mission | Data Miner |
Empowerment is a Main Mission in The Ascent. Main Missions mainly focus on progressing the main campaign and story of the game where you explore the world of Veles to find out what has happened through the arcology. Completing missions grants various rewards such as Weapons, Armor, and more, but most importantly, it yields EXP that is allocated into leveling up the player's character.
To ensure protection agasinst Onyx Void and rival corporations, the IoHab needs to boost its security systems. But to power these, it needs a secure source of energy, and this would also benefit the fragile IoHab alliance as a whole. Boss Poone wants to secure the nearest fission powerplant by hacking a sort of energy distribution backdoor to be used by the IoHab Alliance.
Empowerment Objectives
- Speak with stackBoss Poone
- Go to the Reactor Facilities
- Boost Cooling System
- Raise Energy Output
- Override Distribution Hub
- Conceal the Train from the Tokamak SI
Empowerment Items
- Shirt Skin: Neon Giant
- Shirt Skin: Pink
- Shirt Skin: Canary
- Ice-Breaker Googles
- F-30 Hellfire Work Jacket
Empowerment Related NPCs
Empowerment Enemies
Empowerment Walkthrough
Reach the Reactor Facilities

This mission becomes immeditaely available after completing Trading Places. You'll be back in Cluster 13 at the end of the previous mission, so head back to Serenity Plus and speak to stackBoss Poone to obtain your next job. Poone basically asks you to secure power to strengthen the defenses against the Onyx Void and other corpos. After speaking to Poone, we'd recommend you to increase your level first, upgrade your Skills, Weapons, and Armor to prepare for this mission.

If you're done, travel to The Warrens and head east and ride the Arcology below to reach the Reactor Facilities, you'll need to pass through the Deepstink > Waste Recycling Network, then reach RBM-5. Work your way through the deepstink and the waste recycling network as you fight hordes of Ferals. The path here is pretty linear until you reach the reactor facility, RBM-5.

When you're about 300m away from the reactor facility, you'll come across a small commoners area, here you'll find a snack vending machine, a Basic Component, two lockers containing some UCREDs, and loot crates that you can destroy to find more items. From here, just go staight, hack the door, and fight your way through more Ferals until you reach RBM-5.

Before you proceed to the facility's entrance, after passing through the commoner's area, and then hacking the door, you'll see a terminal that controls a bridge on the left side. Activate it and walk all the way to the end at the west side, you'll find a red chest containing x1 Skill Point - after grabbing it, go back and head towards the reactor facility.
Override the Hub

Upon reaching RBM-5, you'll have three objectives here, reach three different panels to boost the cooling system, to raise the energy output, and to override the distribution hub. Simply press O on the keyboard so that you can track the location of the panels. All you need to do is proceed there first since most of the areas around the facility are locked and you need to override the hub first in order to unlock certain doors, there are however, lockers and crates in some rooms which you can open to find UCREDs or skins.

When you obtain the task to raise the energy output, you'll reach the RBm-5 Core. When you arrive at the core's terminal, you'll find a red chest on the left containing a F-30 Hellfire Work Jacket. After grabbing the item, interact with the control rod assembly to raise the energy. When that's done, just proceed to the next terminal to override the distribution hub. From here, you just need to find the room containing the SI so that you can conceal the opreation you've just done.
Boss Battle: Megarachnoid

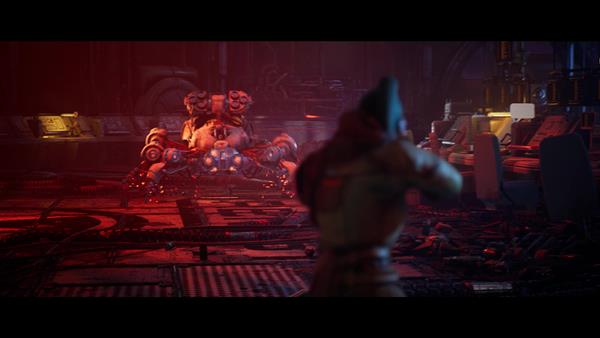
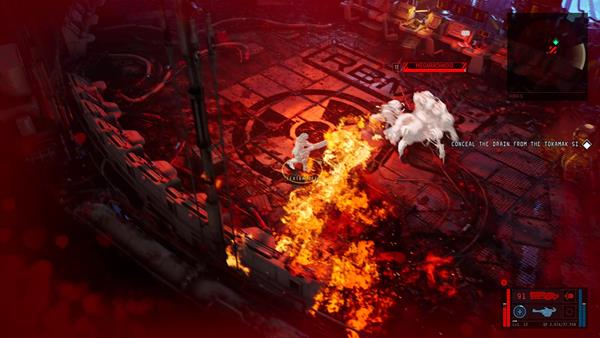
Upon reaching the room that's holding the SI, you'll encounter a boss which is the Megarachnoid. A large spider-mech that can be quite challenging to face. For this boss, the Megarachnoid has two attacks, one is where it sprays flames at you like a flamethrower, and the other is where it spawns small mechanical spiders at you either from itself or from the mechanical eggs it shoots on the ground.

For this boss battle, you may need to have your Evasion skill at a high level or equip an armor piece that has high defense. Another way to help you is to use an Assault Rifle that is upgraded and has high damage to easily destroy this boss. Maintain a mid-distance as well so that you don't catch yourself in flames from its Flamethrower attack. The biggest tip to defeat this boss is to purchase the ER Chrome Puncher. It is a precision rifle that shoots out energy bullets. This can deal significant damage since you are fighting a mechanical enemy.

What you want to watch out for are when it shoots out mechanical eggs that spawn those small spiders or when the Megarachnoid does it. When you see these small spiders, immediately shoot it down before it gets close to you and destroy those mechanical eggs. You can also hack it so that you can shoot it and make it explode like a bomb when it is lit with a green indicator. If ever a spider does get near you, wait for about 1 second before you dodge roll because it will prepare before it jumps on you.
It can be quite annoying if you get hit multiple times since it has a blast radius that stuns and damages you. Keep moving while you shoot and keep an eye out for those baby spider-bots. After defeating the boss, you'll complete this quest, be rewarded with 30,000 XP, head out the exit on the north side of this boss arena and activate the bridge to find two chests, from there, return to Cluster 13, report to your new boss and start the next mission.
Empowerment Notes & Tips
- ??
- Notes, Tips, and other info goes here

So does anyone know how to get the chest on the other side of the panel districution panel?
0
+10
-1